
Sub-Accounts
Overview
With Sub-Accounts, child entity accounts can be created, and carry all the functionality from the Main Account over.
Businesses with sister companies for instance, can create these types of accounts to serve separate businesses via one Main Account. Additionally, companies that serve multiple clients, like Accountancy firms, or Payroll Bureaus can benefit from creating Sub-Accounts also, as it enables users to carry out multiple operations for each client separately.
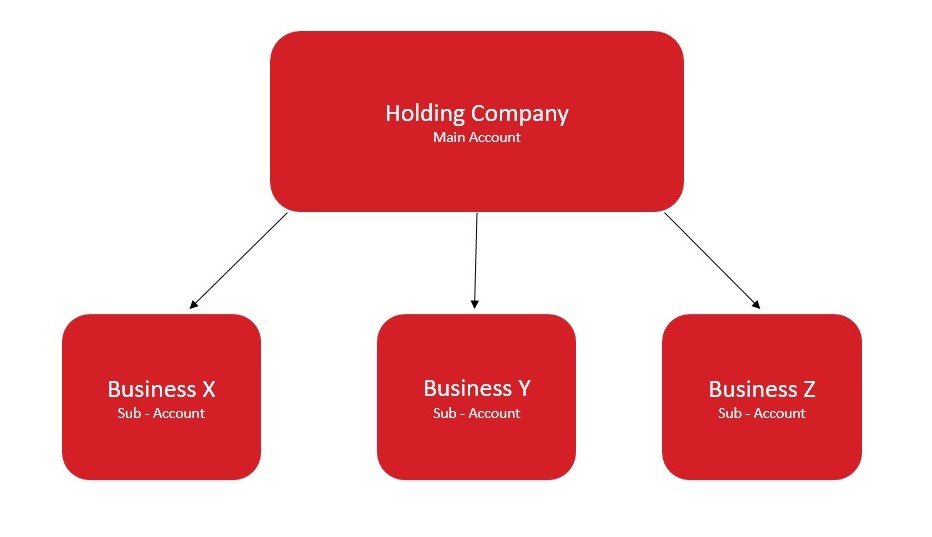
As demonstrated in the diagram below, the holding company acts as the Main Account, and businesses X, Y and Z are created as Sub-Accounts.
Identity Number
The IdentityNumber is used to identify a Sub-Account.
When performing Bulk Payments, Payroll, and other functions on behalf of a Sub-Account, this Id, enables direct access from the Main Account without having to perform any additional sign-in requirements.
Create Sub-Account
If this is a New Sub Account, follow Step1(a). Create a New Sub-Account. For Existing Sub-Accounts that haven't yet had a UserId issued, skip to Step 1(b).
Step 1(a). Create a New Sub-Account
Use the POST - Create Subsidiary Account endpoint, and enter the name of the business and the corresponding email address.
REQUEST
curl --location 'https://caxapi-integration.azurewebsites.net/api//clients/subsidiary' \
--header 'Authorization: Bearer <access_token>' \
--header 'Content-Type: application/json' \
--data-raw '{
  "CompanyName": "demo45",
  "Email": "[email protected]"

}'
RESPONSE
A successful response returns the following, Note how the Username is created on line four. The Name on line five is both the CompanyName entered in the request body, and the Clientname used as part of the API password generation request in later steps:
{
    "Content": {
        "Model": {
            "Username": "<username>",
            "Name": "demo45",
            "ApiStatusCode": 100,
            "ApiStatus": "IsValid",
            "ApiStatusDescription": "Valid Operation"
        },
Step 1(b). Create API Username for an Existing Sub-Account
In some cases, the Sub-Account may already be created, but not the credentials for the account. In such events, call the PUT - API Subsidiary Credentials endpoint to create a Username for the account.
To do this:
- Call the
GET - Retrieve All Sub-Accountsendpoint and find theIdentityNumberfor the Sub-Account you wish to create credentials for. - Call the
PUT - API Subsidiary Credentialsendpoint. - Enter the corresponding
IdentityNumber.
A successful response is shown below. Note how the Username is created on line four. The Name on line five represents the company name for this Sub-Account: "LoremIpsum".
RESPONSE
{
    "Content": {
        "Model": {
            "Username": "<userid>",
            "Name": "LoremIpsum",
            "ApiStatusCode": 100,
            "ApiStatus": "IsValid",
            "ApiStatusDescription": "Valid Operation"
        },
        "ExpectedResponses": [
            "IsValid"
}
Step 2. Create API Password for a New or Existing Sub-Account
Once the Username is created, the next step is to generate a password for the account. To do so:
- Call
POST - Generate Password. - Enter the
Usernamecreated in Step 1(a) or in Step 1(b). - For
Clientname, enter theCompanyNameorNameassigned to the entity in Step 1(a) or in Step 1(b). - A successful response returns a
ClientPassword.
REQUEST
This is an example request with the Username and Clientname fields populated:
curl --request POST \
     --url https://sandbox.caxton.io/api/clients/auth/register \
     --header 'accept: application/json' \
     --header 'content-type: text/json' \
     --data '
{
  "Username": "<username>",
  "Clientname": "<cxtnclient>"
}
RESPONSE
The following shows a successful response, notice how the ClientPassword is generated on line four:
{
    "Content": {
        "Model": {
            "ClientPassword": "<clientpassword>",
            "StartDate": "2023-08-23T10:55:45.0645017Z",
            "EndDate": "2023-09-22T10:55:45.0645017Z",
            "PublicKey": "<publickey>",
            "ApiStatusCode": 100,
            "ApiStatus": "IsValid",
            "ApiStatusDescription": "Valid Operation"
        },
        "ExpectedResponses": [
            "IsValid"
        ]
    }
}
Step 3. Generate Access Token
- Call
POST - Get Access Tokenand populate the following: - For
Grant_Type, typepassword. - Enter the
Usernamecreated in Step 1(a) or in Step 1(b). - Enter the
ClientPasswordcreated in Step 2. Create API Password for a New or Existing Sub-Account. - If the request is submitted successfully, an
access_tokenis created.
REQUEST
curl --request POST \
     --url https://sandbox.caxton.io/api/token \
     --header 'accept: */*' \
     --header 'content-type: application/x-www-form-urlencoded' \
     --data Grant_Type=password \
     --data Password=<password> \
     --data Username=<username>
RESPONSE
This is an example response, with the access token as shown on line two:
{
  "access_token": "<access_token>",
  "token_type": "bearer",
  "expires_in": 2591999
}
expires_in is in seconds. By default, this is 30 days.
Get details for a Sub-Account
To find out the details for a Sub-Account, call GET - Retrieve All Sub-Accounts. This endpoint lists every account created by the Main Account.
Sub-Accounts can be identified mainly by their CompanyName value, but also by their corresponding IdentityNumber and ApiClientUsername.
To check if a Sub-Account is active or inactive, ApiAccountActive must be set to true or false respectively.
Deactivate Sub-Account
Although Sub-Accounts cannot be deleted, they can be deactivated. To do so:
- Call the
PUT - Deactivate a Sub-Accountendpoint. - Enter the
IdentityNumberfor the Sub-Account. - A successful request, changes the
ApiAccountActivevalue fromtruetofalse. To check this value, callGET - Retrieve All Sub-Accounts.
Reset API Client Credentials
To reset the password for a Sub-Account follow these instructions:
- Call the
PUT - Reset Client Credentialsendpoint to reset the client password. - Enter the
IdentityNumberfor the Sub-Account. - Call
POST - Generate Passwordto generate a new password.
Updated about 1 year ago